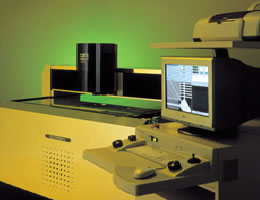
 FEATURES FEATURES |
| 1. Dramatically accelerated image processing |
| Our highly stable non-contact optical linear scale and unique high-speed
multi-function image processing software allow single point measurement
times of 0.4 seconds. (Totaling less than 1 second even including the camera's
movement time.) |
| 2. Simplified operation with the Windows® GUI |
| The equipment now incorporates the Windows NT operating system to provide
more user-friendly operation. Thanks to the new graphic-based editor, editing
work can now be entirely performed with graphic symbols and commands, speeding
verification of measurement positions and patterns. It is also now possible
to quickly run searches or utilize data by adding various information to
a database containing measurement programs and measurement results. |
| 3. Efficient use of CAD data |
| In order to utilize CAD data efficiently, a variety of optional software
programs are available. For instance, the aperture data conversion function
automatically expands the measurement items relevant to the Gerber-format
aperture data into a measurement program. The CAD data import function can
also be provided for enabling one to create a measurement program, even
if there is actually no measurement object on the glass table, by importing
CAD data to the measurement display. |
| 4. Supports verification for Automatic Optical Inspection System |
| It is now possible to retrieve any defect information, simply by connecting
the DR-5500-F II with our Automatic Optical Inspection System. This allows
visual verification of defects in addition to the accurate measurement of
defect size on the DR-5500-F II.In this manner, the DR-5500-F II can be
used as verification unit for the inspection system. |
 SPECIFICATIONS SPECIFICATIONS |
| |
| Effective measurement area |
700(X) 900mm(Y) 900mm(Y)
|
| Measurement table size |
1,000(X) 1,254mm(Y) 1,254mm(Y)
|
| Thickness of measurement objects |
Max.60mm |
| Min.detectable unit |
0.1µm |
| Measurement accuracy |
X and Y axis(U1)3+L/250µm |
| (U2)4+L/230µm |
| Repeatability |
 =0.3 =0.3 |
| Drive speed(X and Y) |
Max.200 mm/sec |
| Position detector |
Non-contact optical linear scale |
| Measuring unit |
Microscope with 4-step magnification
(1  ,2 ,2 ,3 ,3 ,4 ,4 ),(1.5 ),(1.5 ,3 ,3 ,4.5 ,4.5 ,6 ,6 ) )
(2 ,4 ,4 ,6 ,6 ,8 ,8 ) )
|
| Fiber type drop-light microscope* |
| 1/2"monochromatic CCD camera , 1/2"color CCD camera*
|
| Illumination system |
Fiber type ring light for drop-light illumination (100W) |
| Fiber type transmission illumination (100W) |
| Power requirements |
1 100V 15A
 |
Dimensions(W D D H) H) |
Main body : 1,360 1,563 1,563 1,260mm 1,260mm |
| Weight |
Main body : 1,250 kg |


